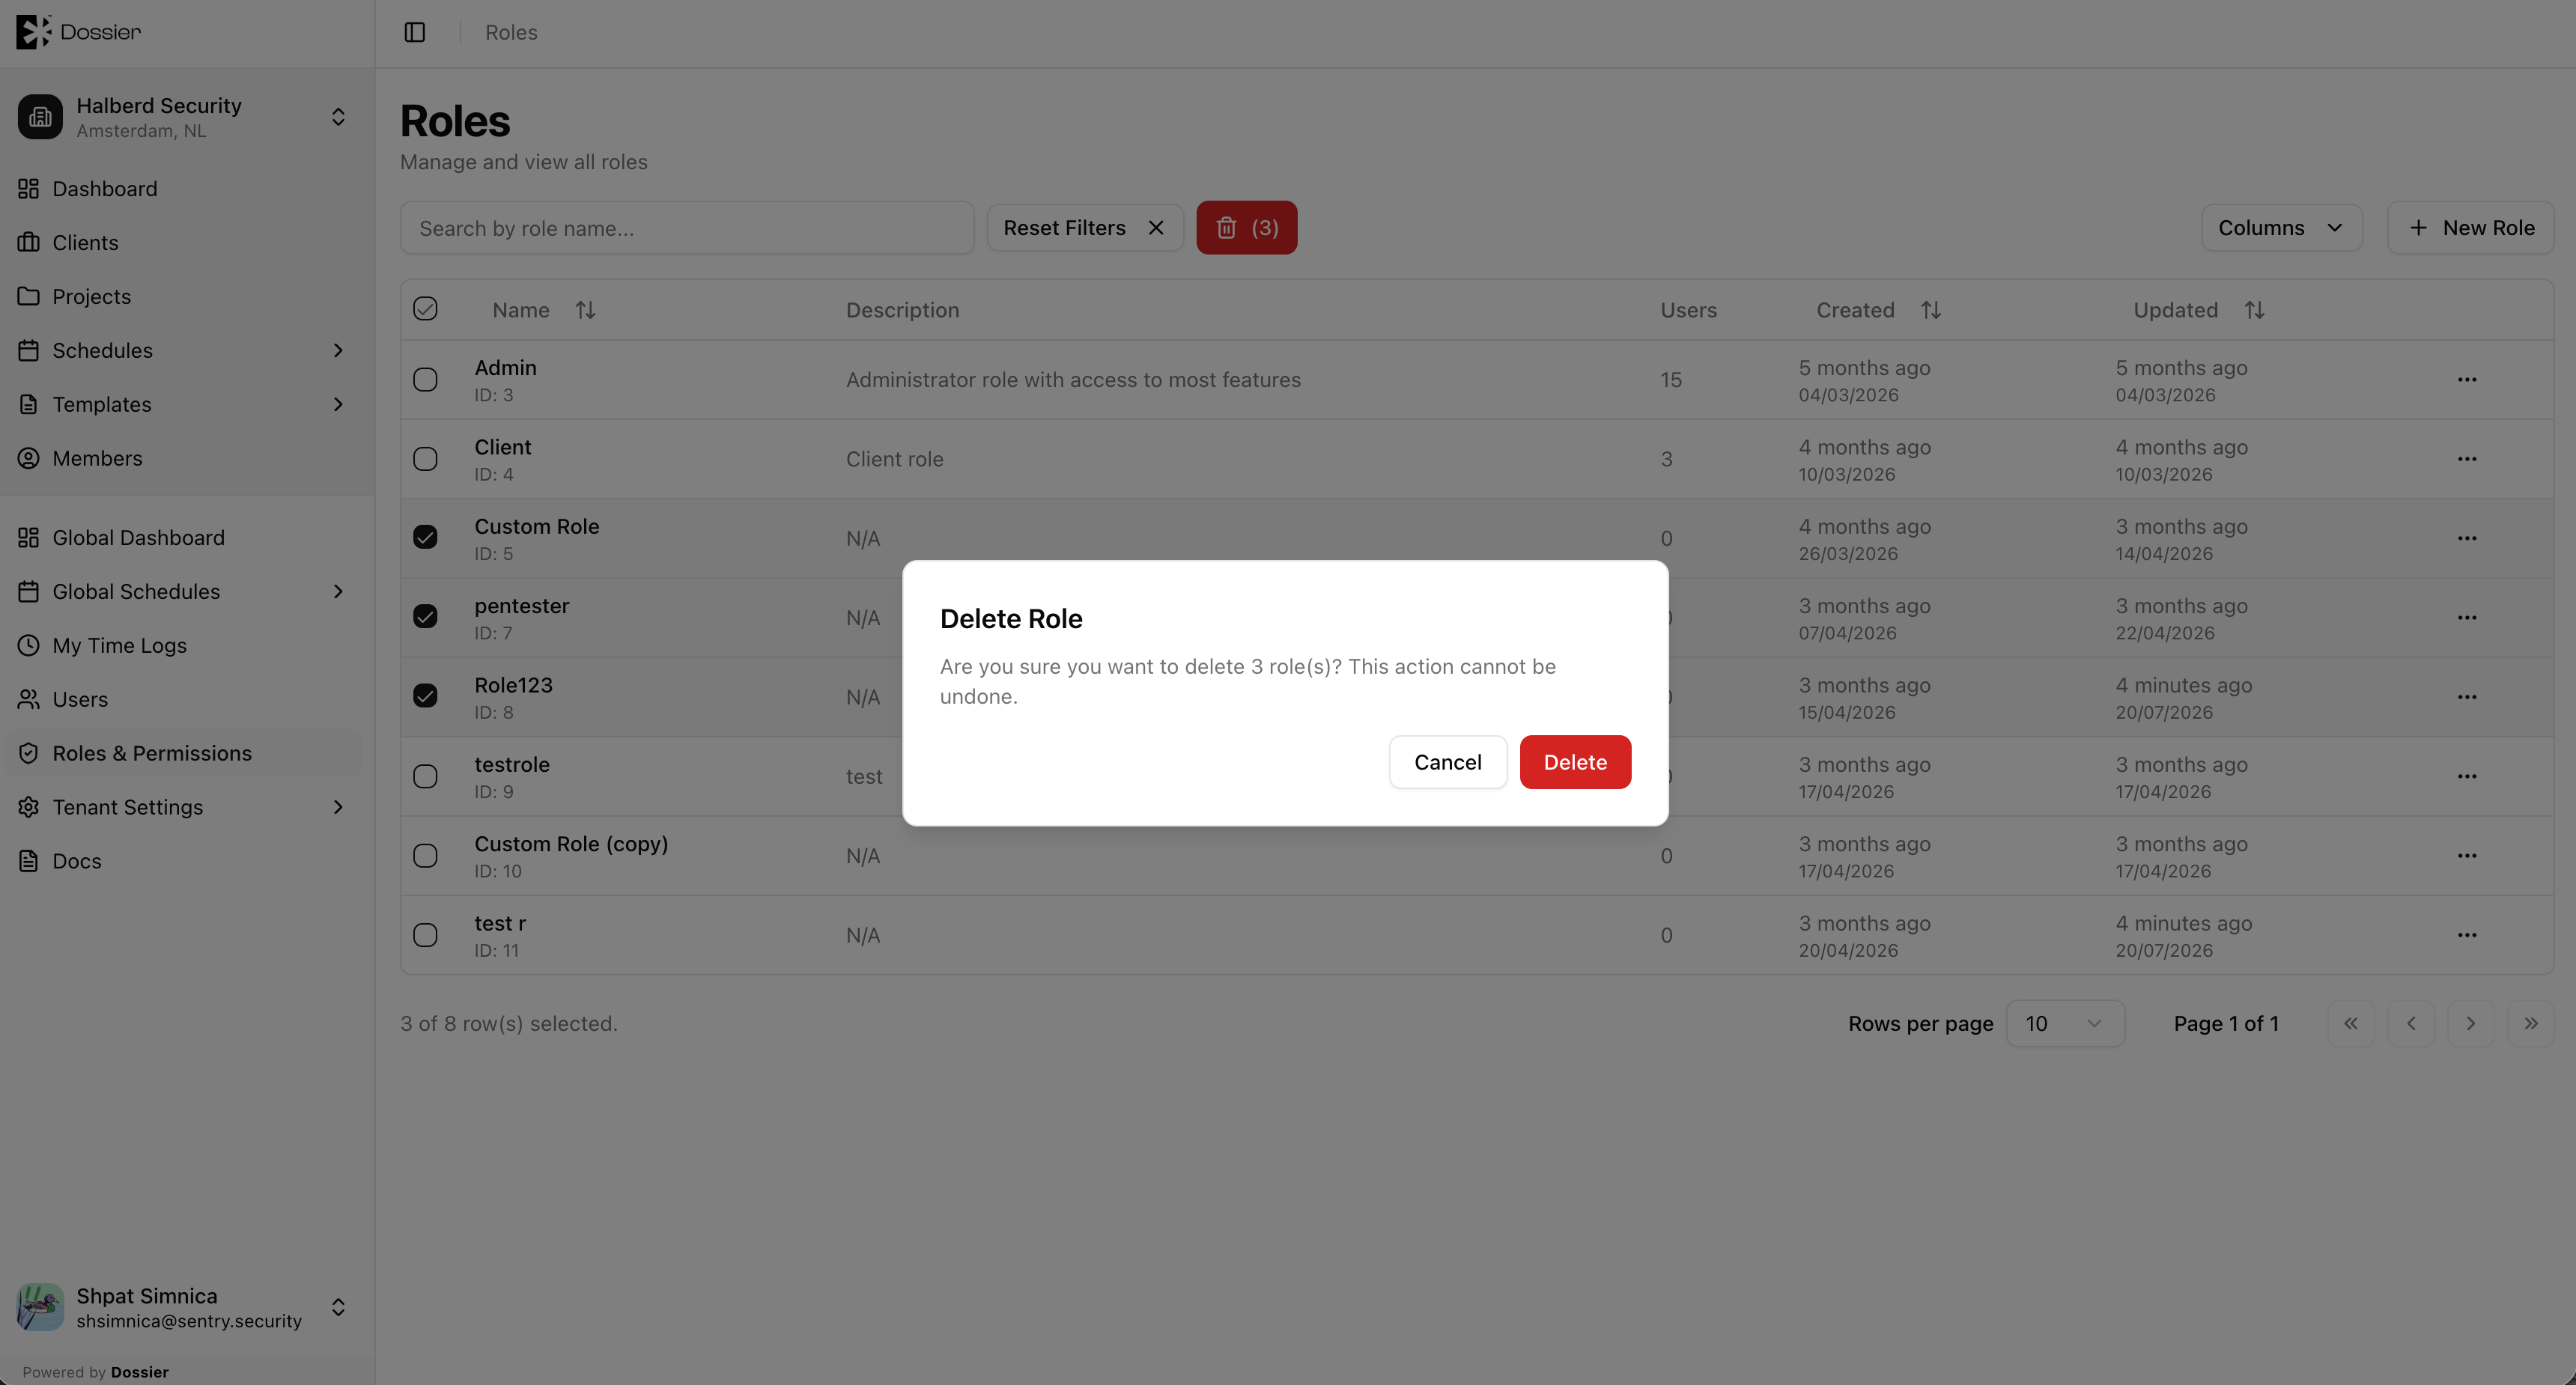
Manage Roles
Creating a New Role
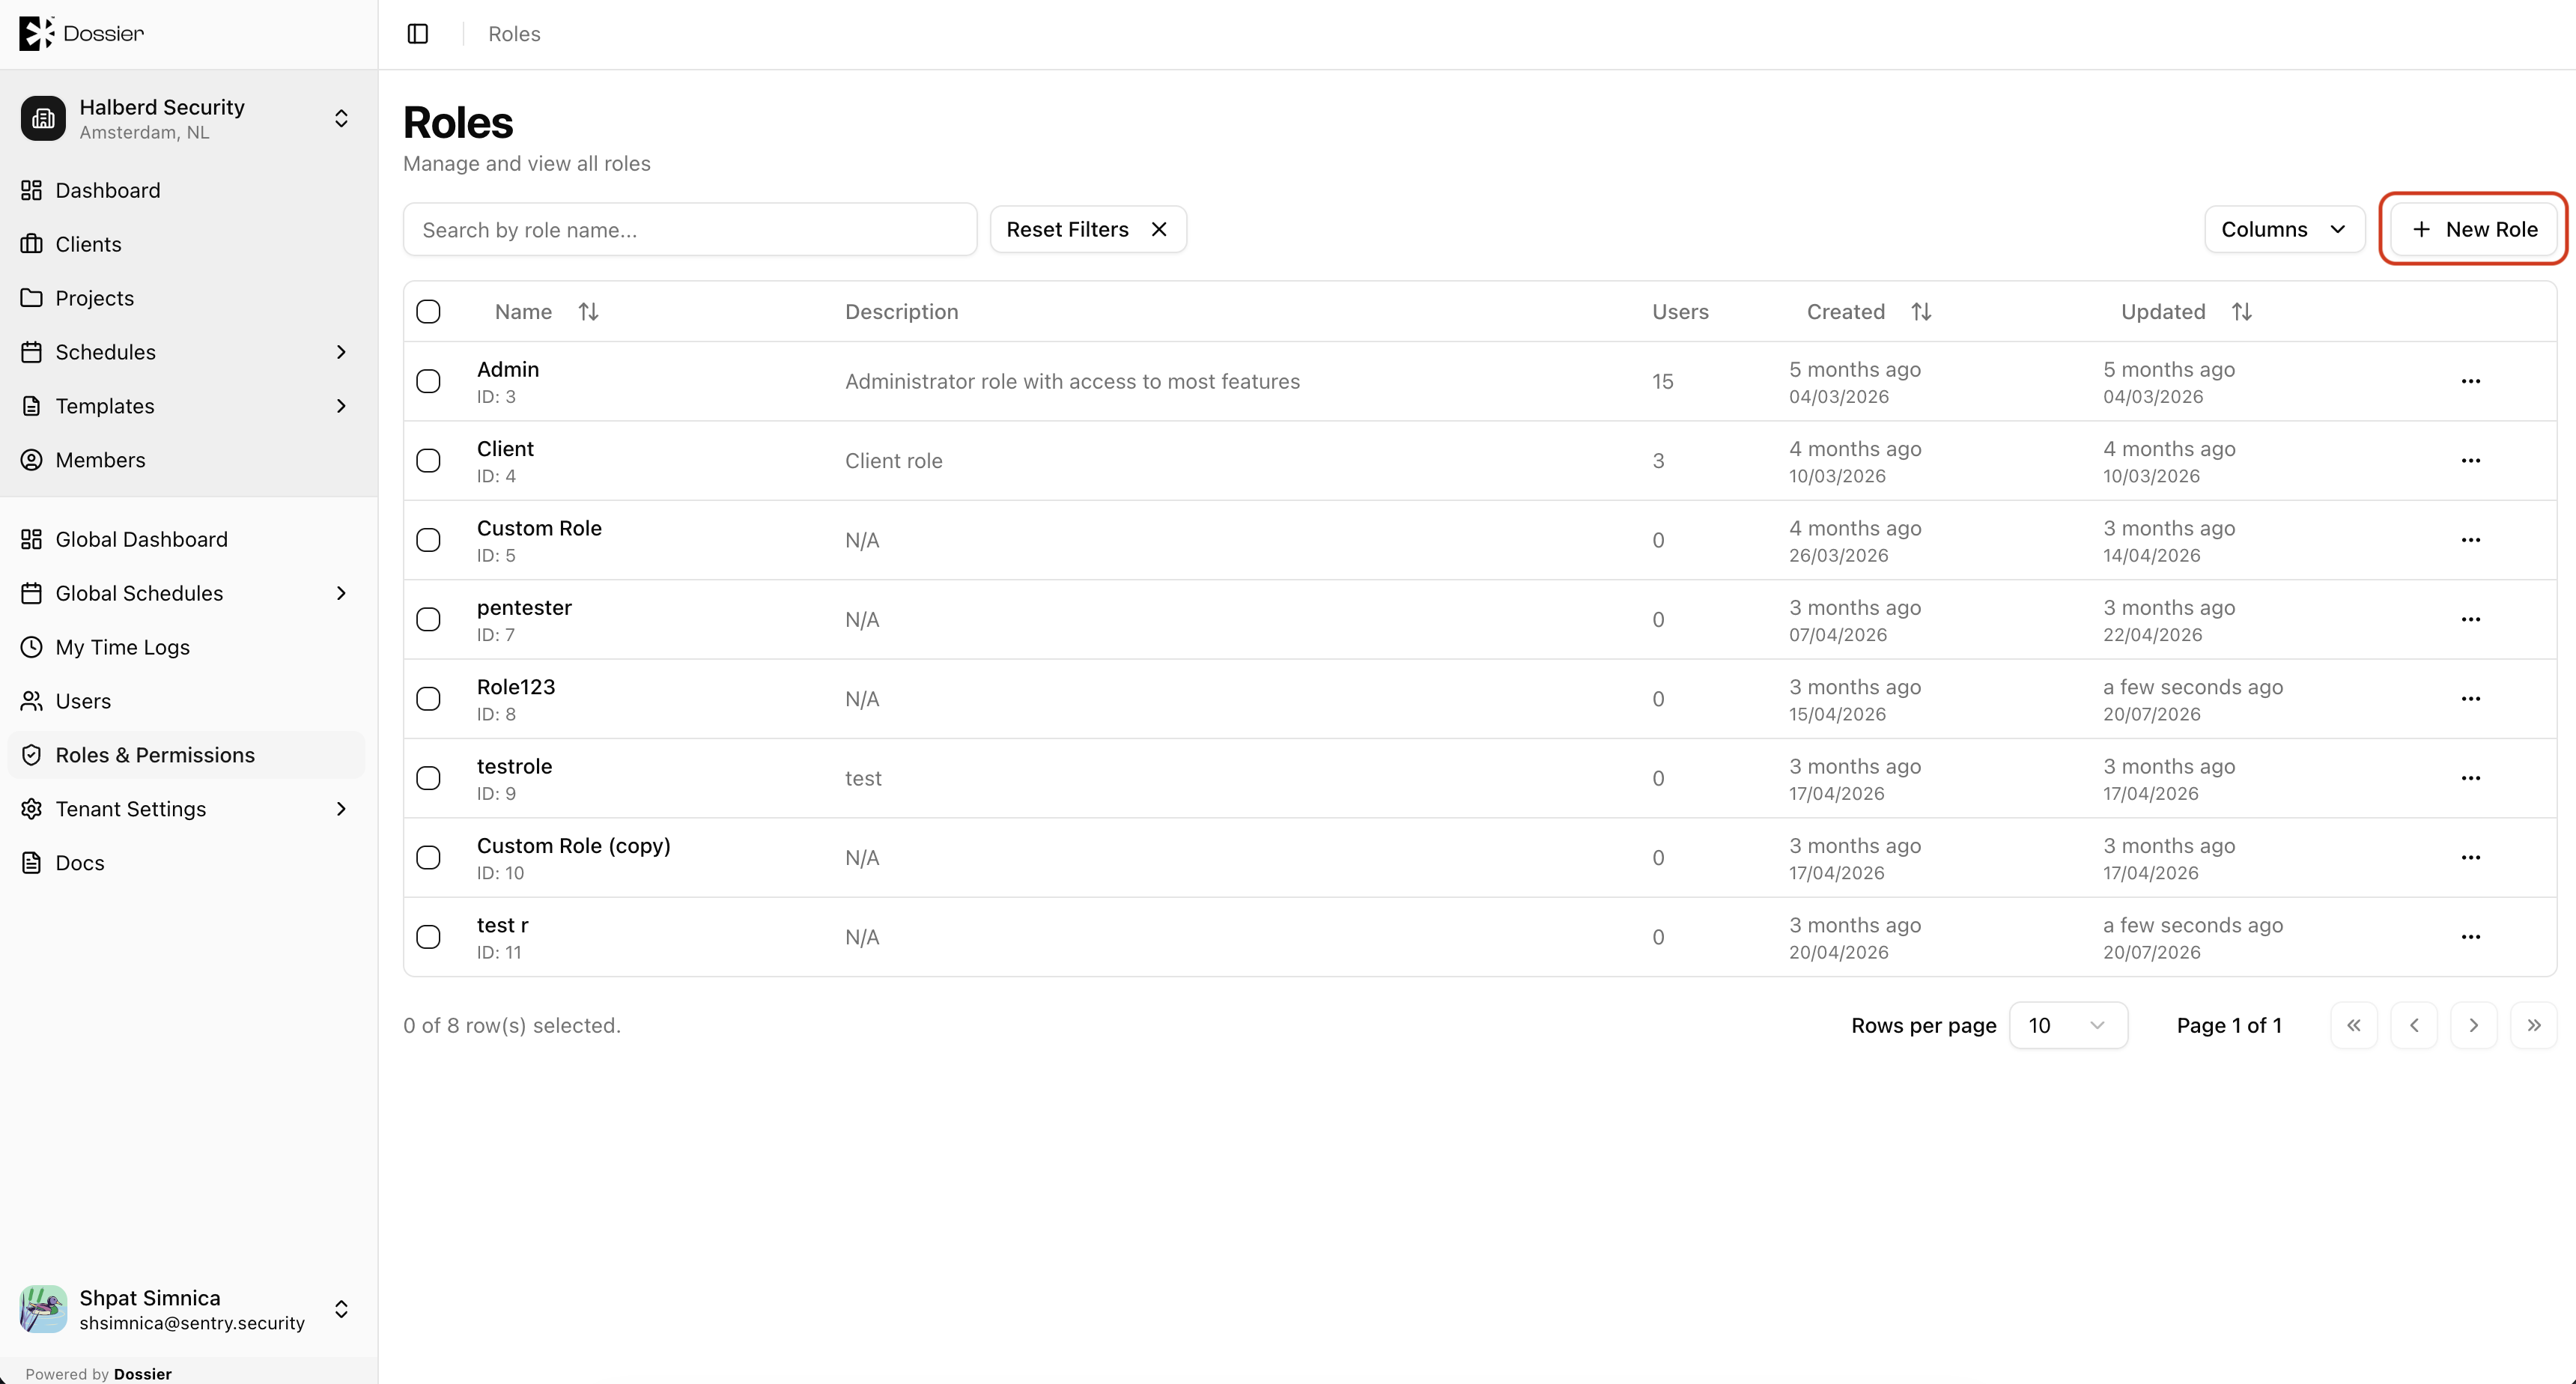
Step 1: Navigate to the Roles section
Click Roles & Permissions in the global sidebar. Click New Role.
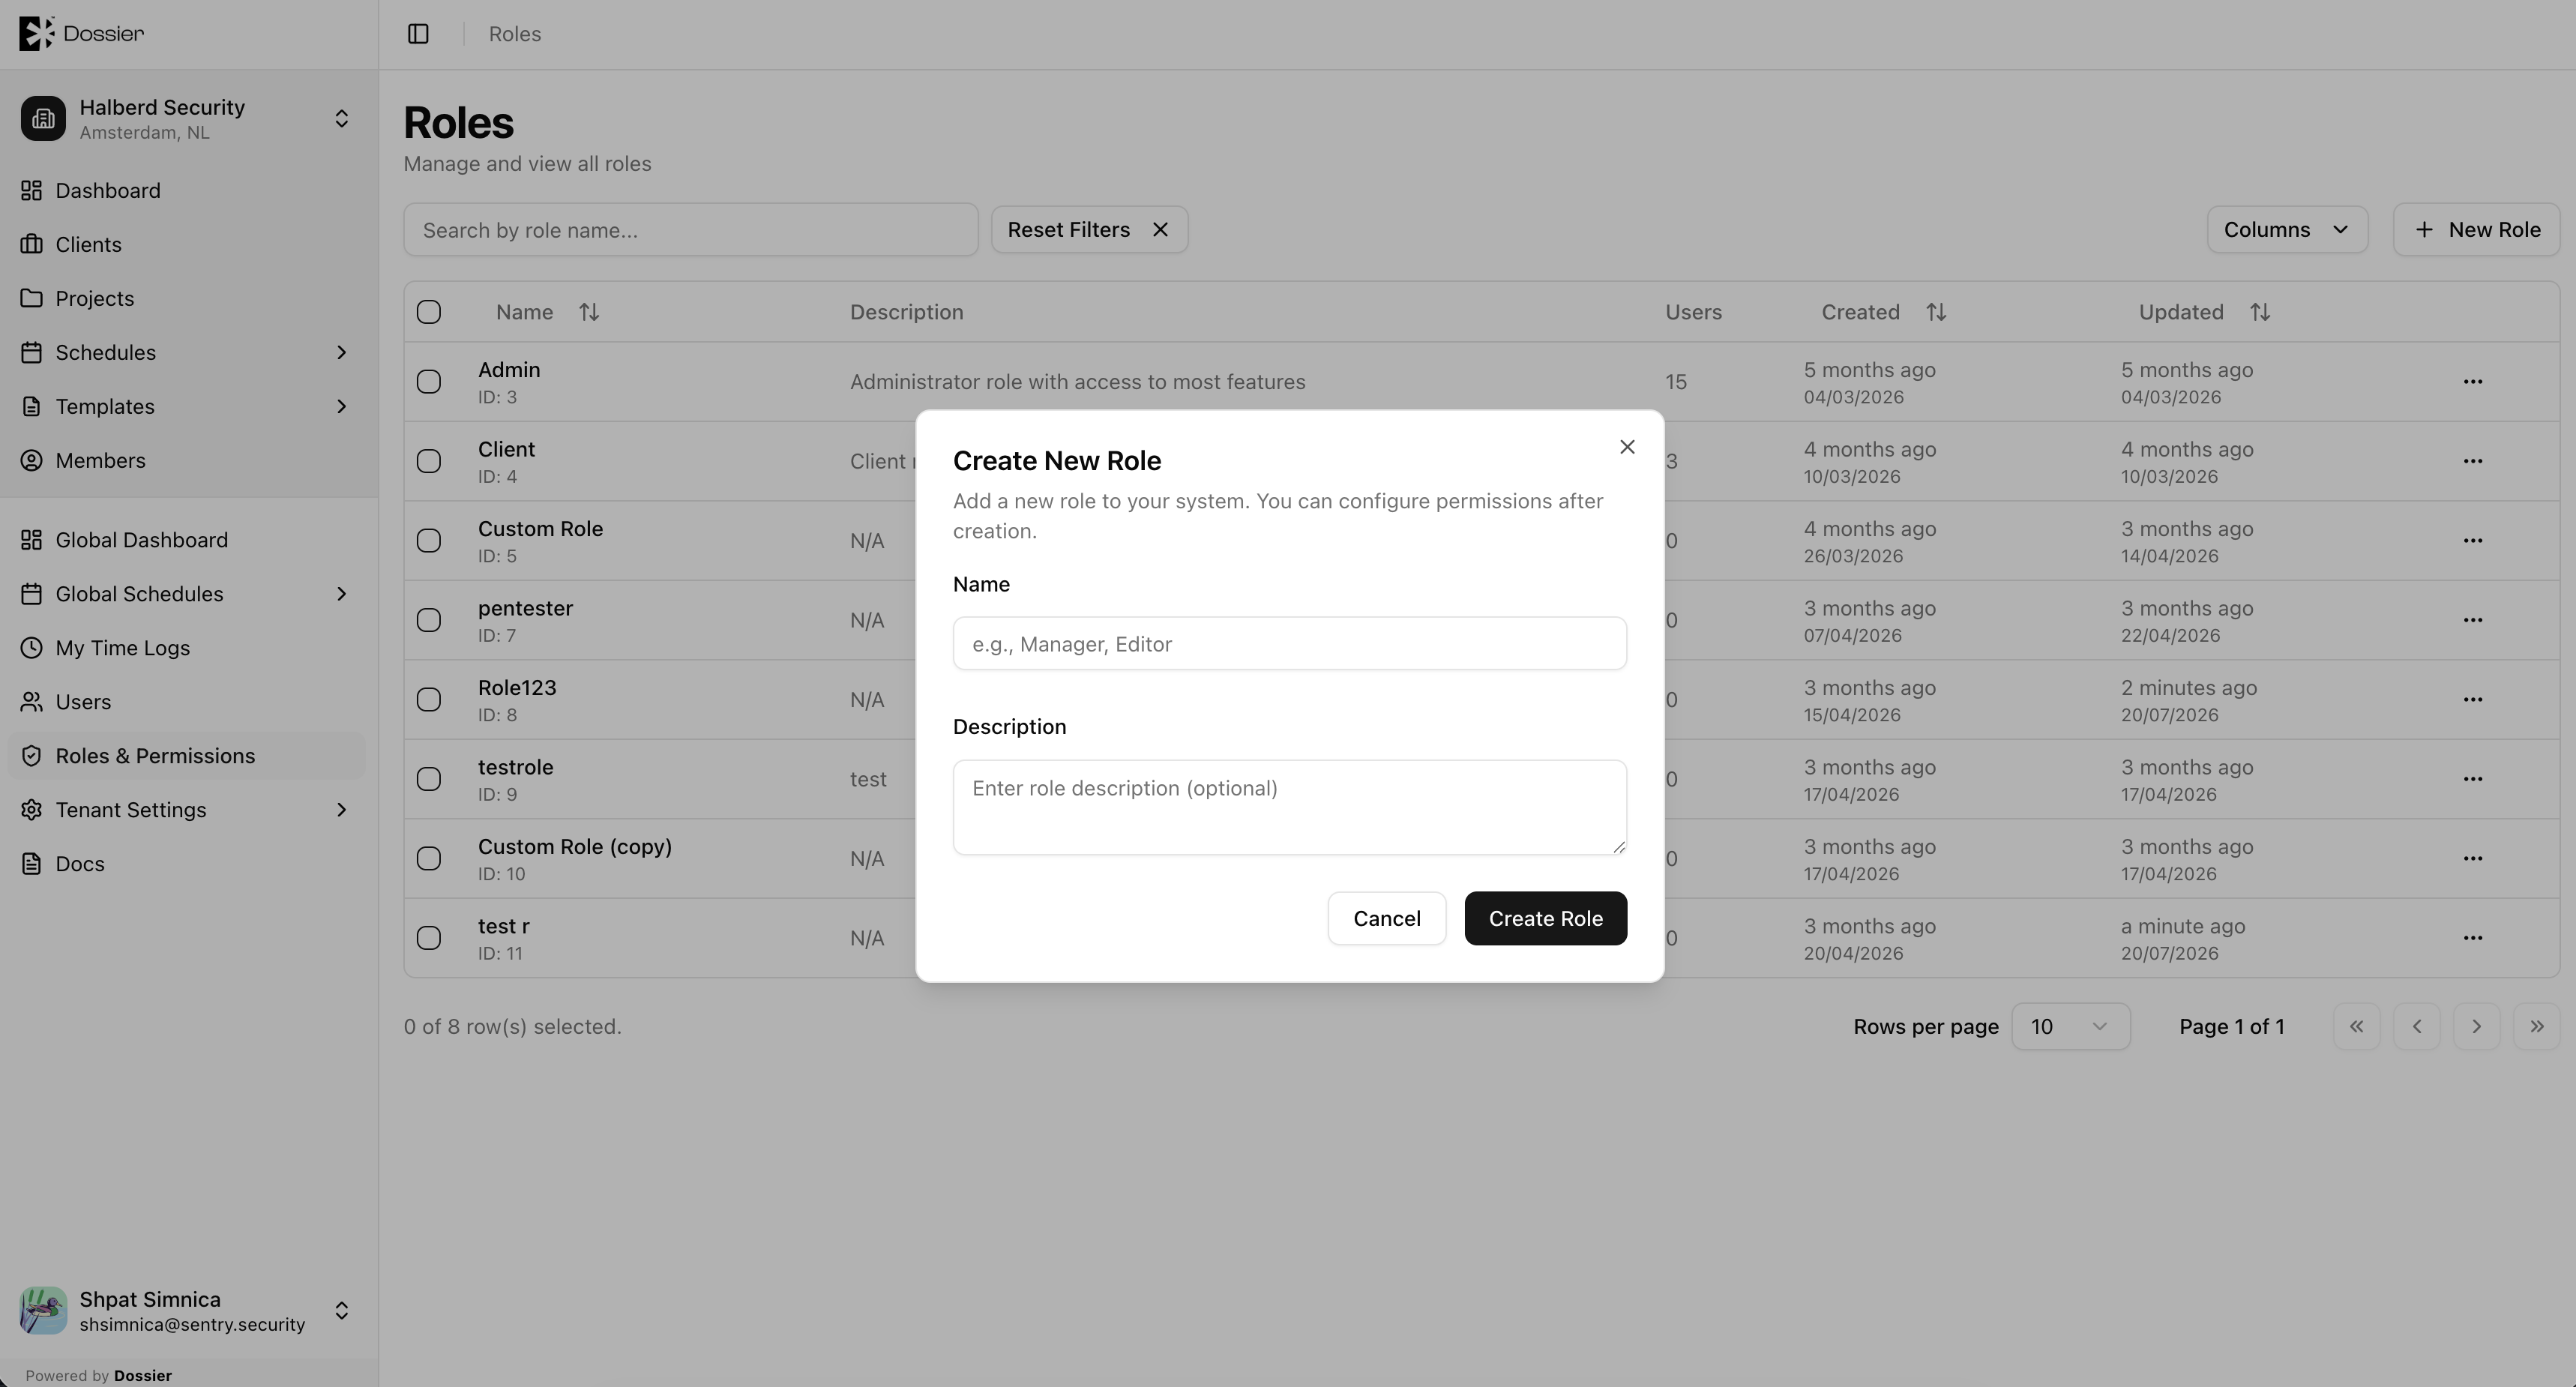
Step 2: Enter role details
| Field | Required | Description |
|---|---|---|
| Name | Yes | Role name (for example, "Pentester", "Project Lead"). |
| Description | No | What this role is for. |
Step 3: Click Create
The role is created with no permissions. Click the role row to configure permissions.
Configuring Permissions
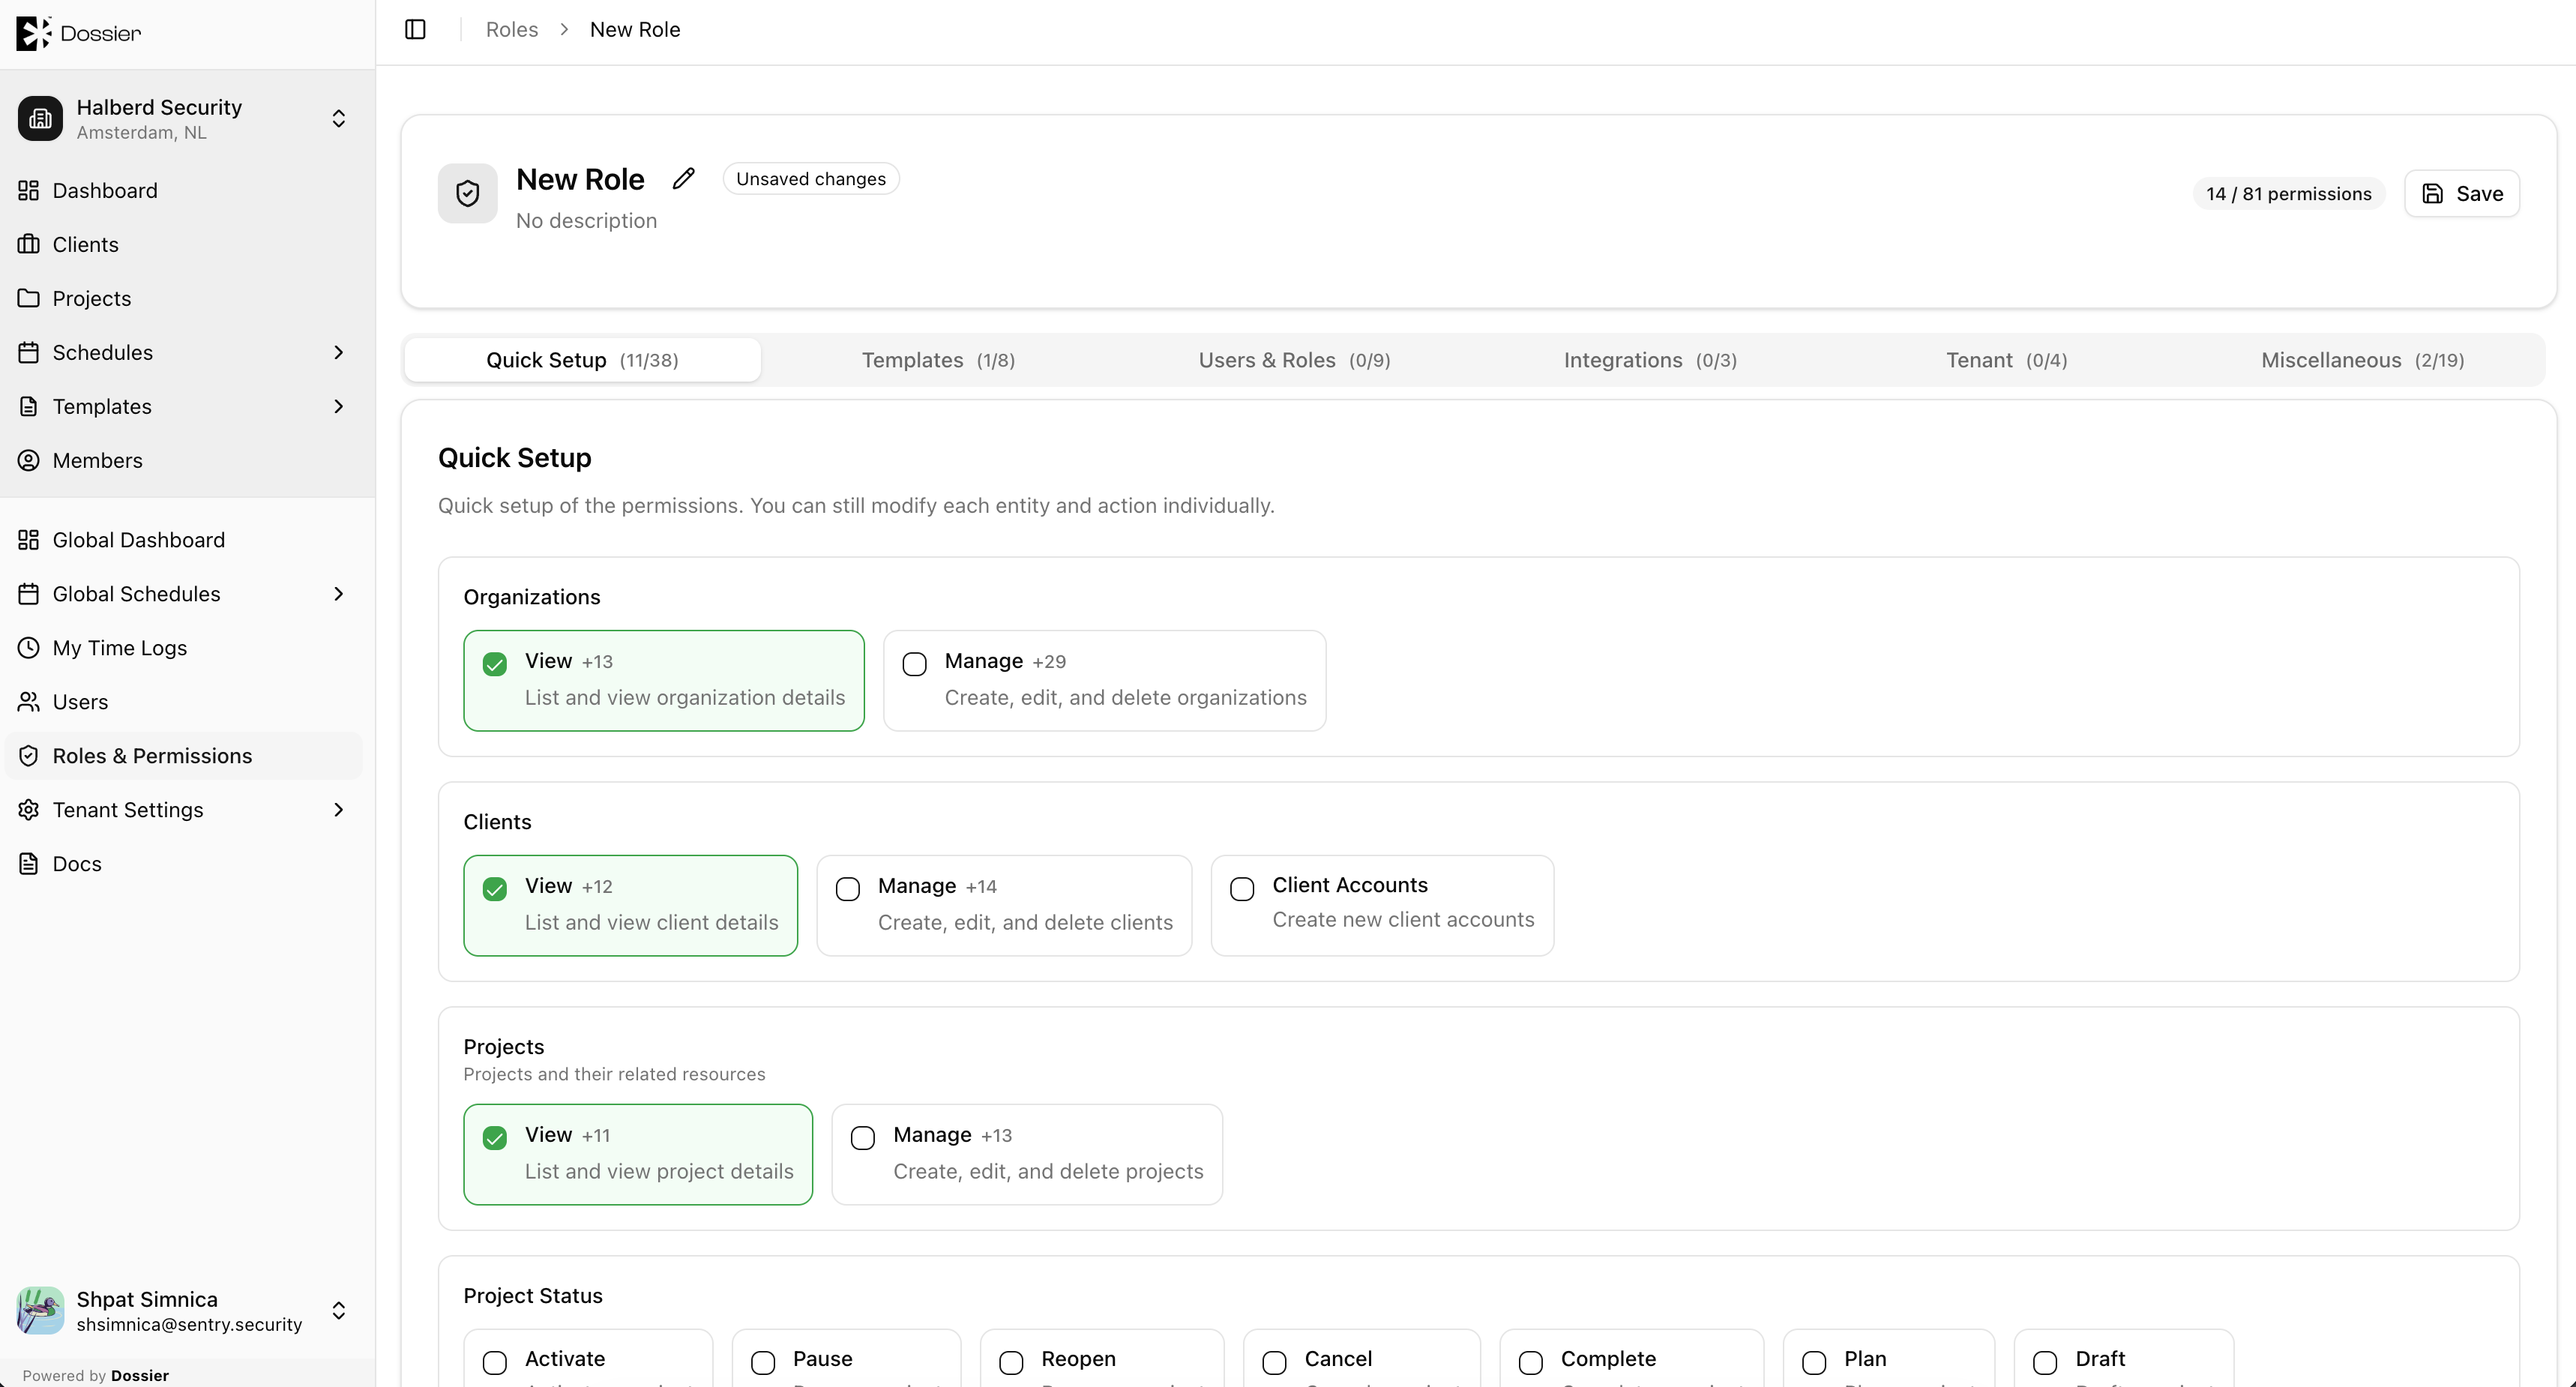
Step 1: Click the role row
Open the role's permission editor page.
Route: /roles/:roleId
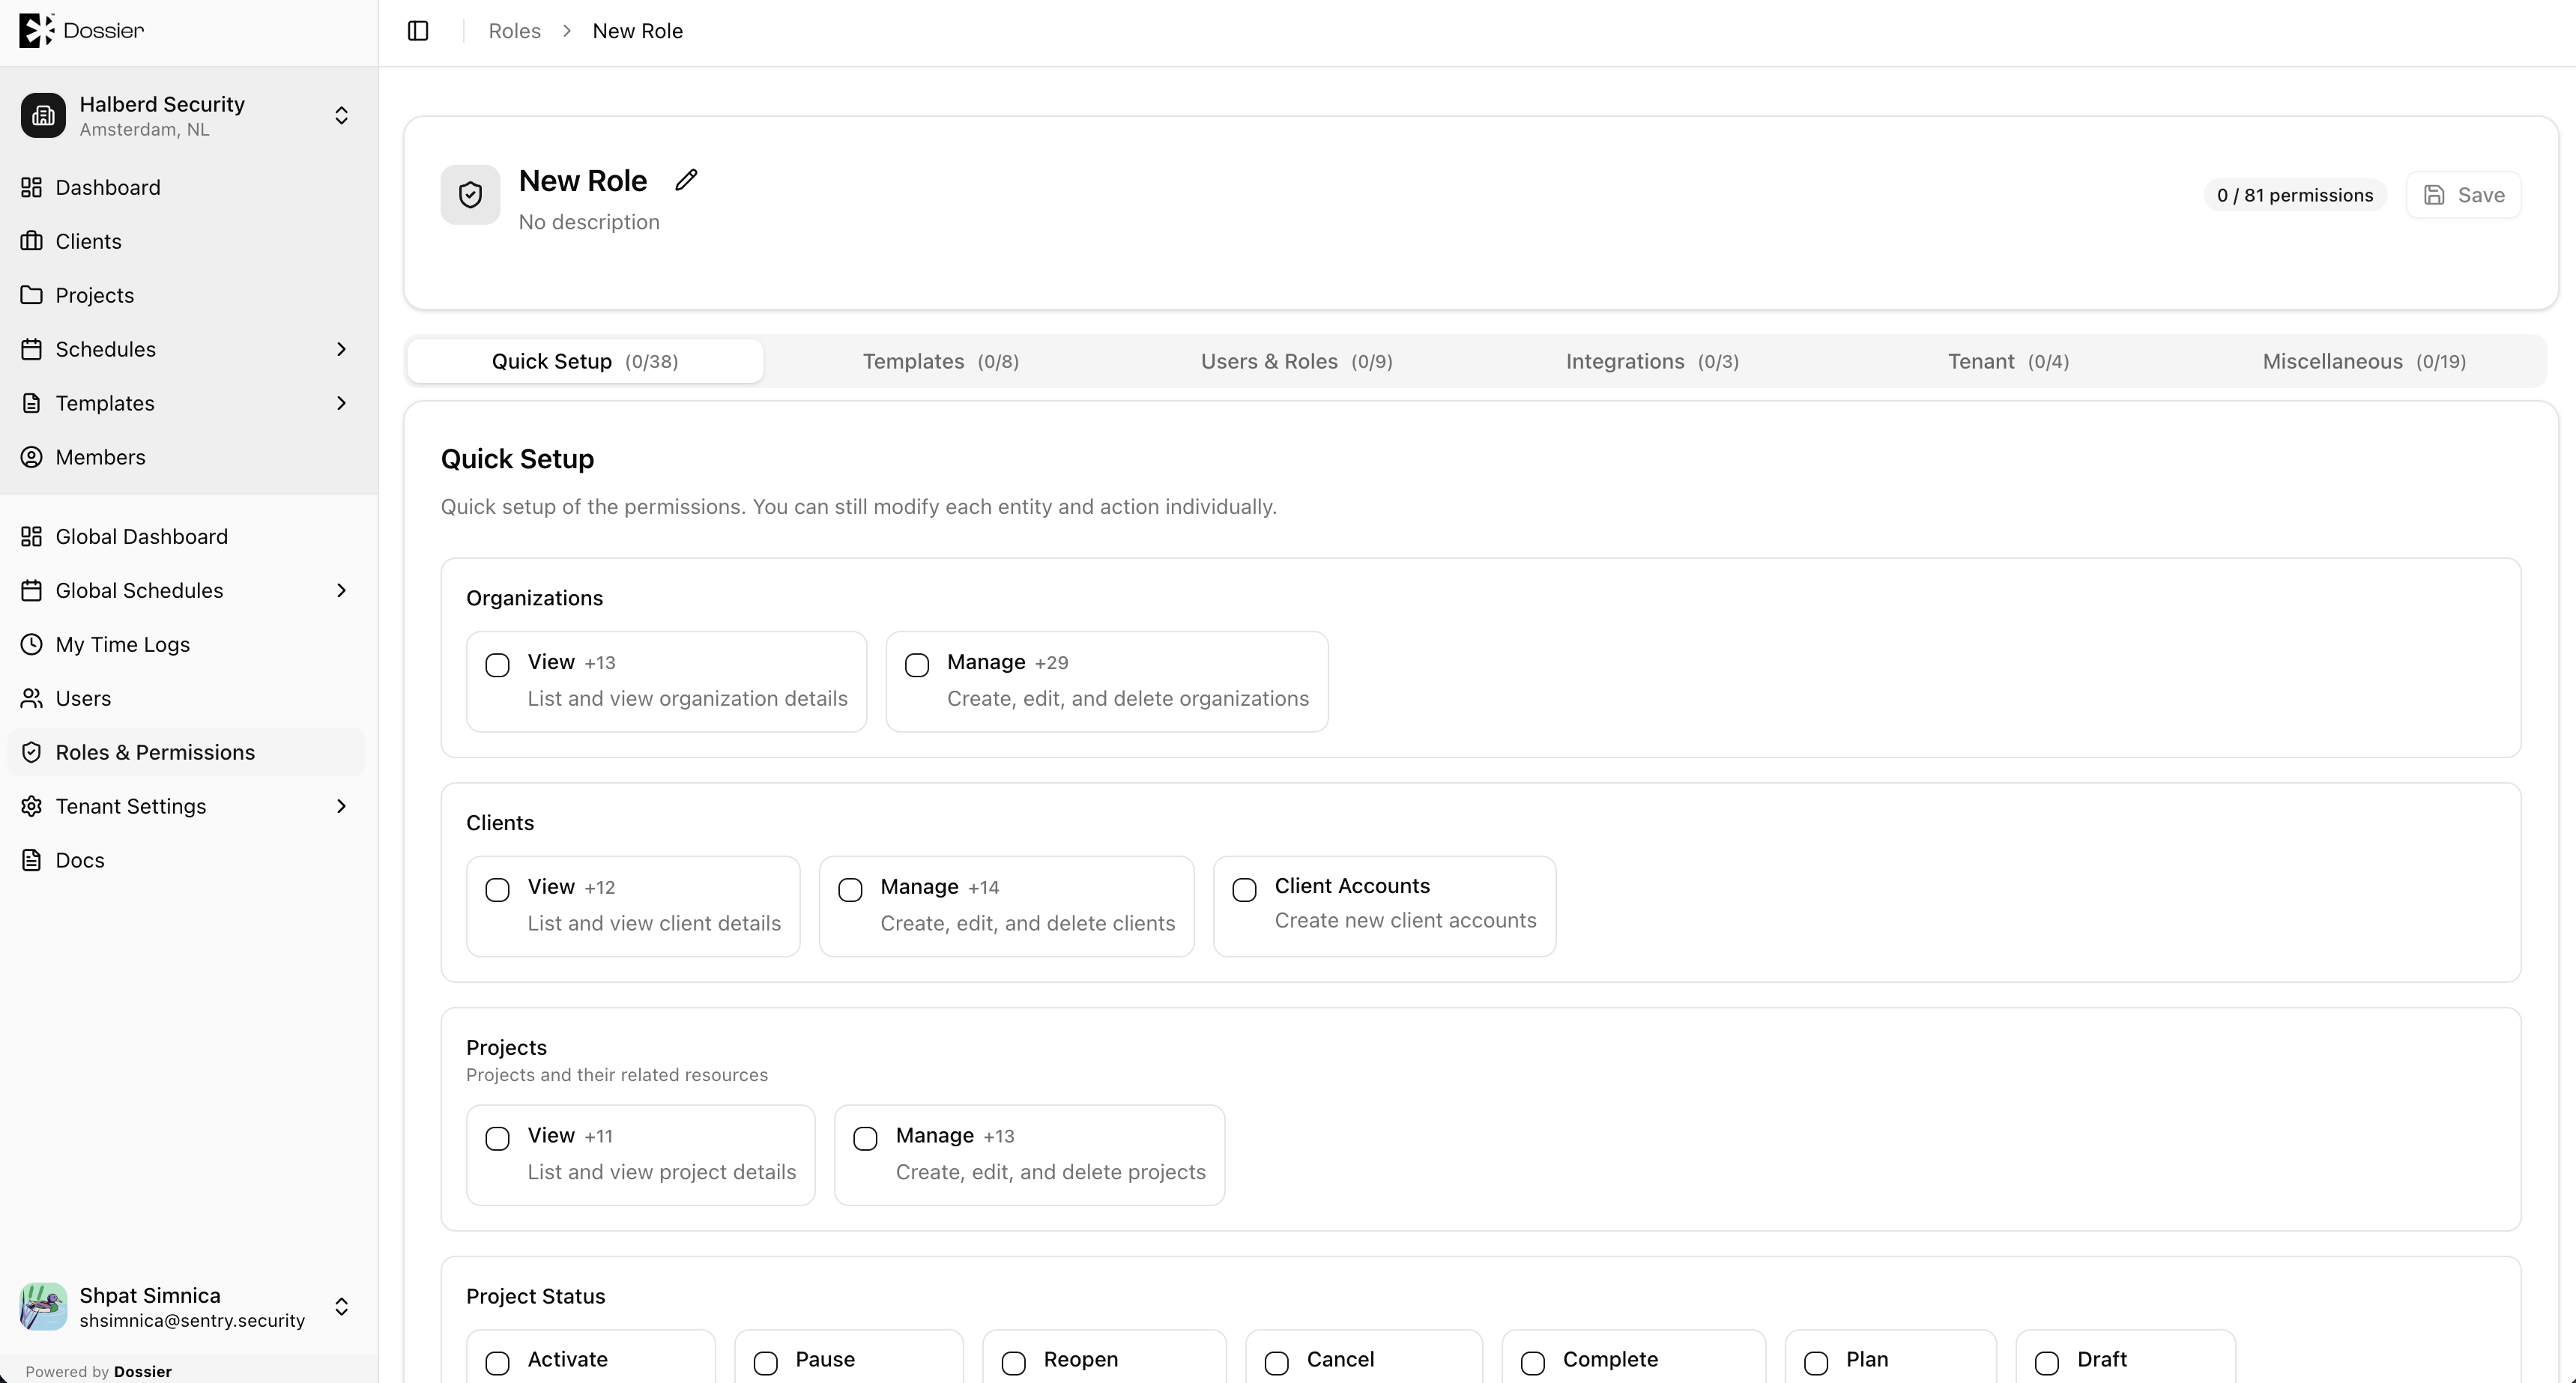
Step 2: Set permissions
Check or uncheck permissions in each group. Changes are saved immediately.
Use Quick Setup groups to enable common permission bundles (for example, full project access, read-only findings).
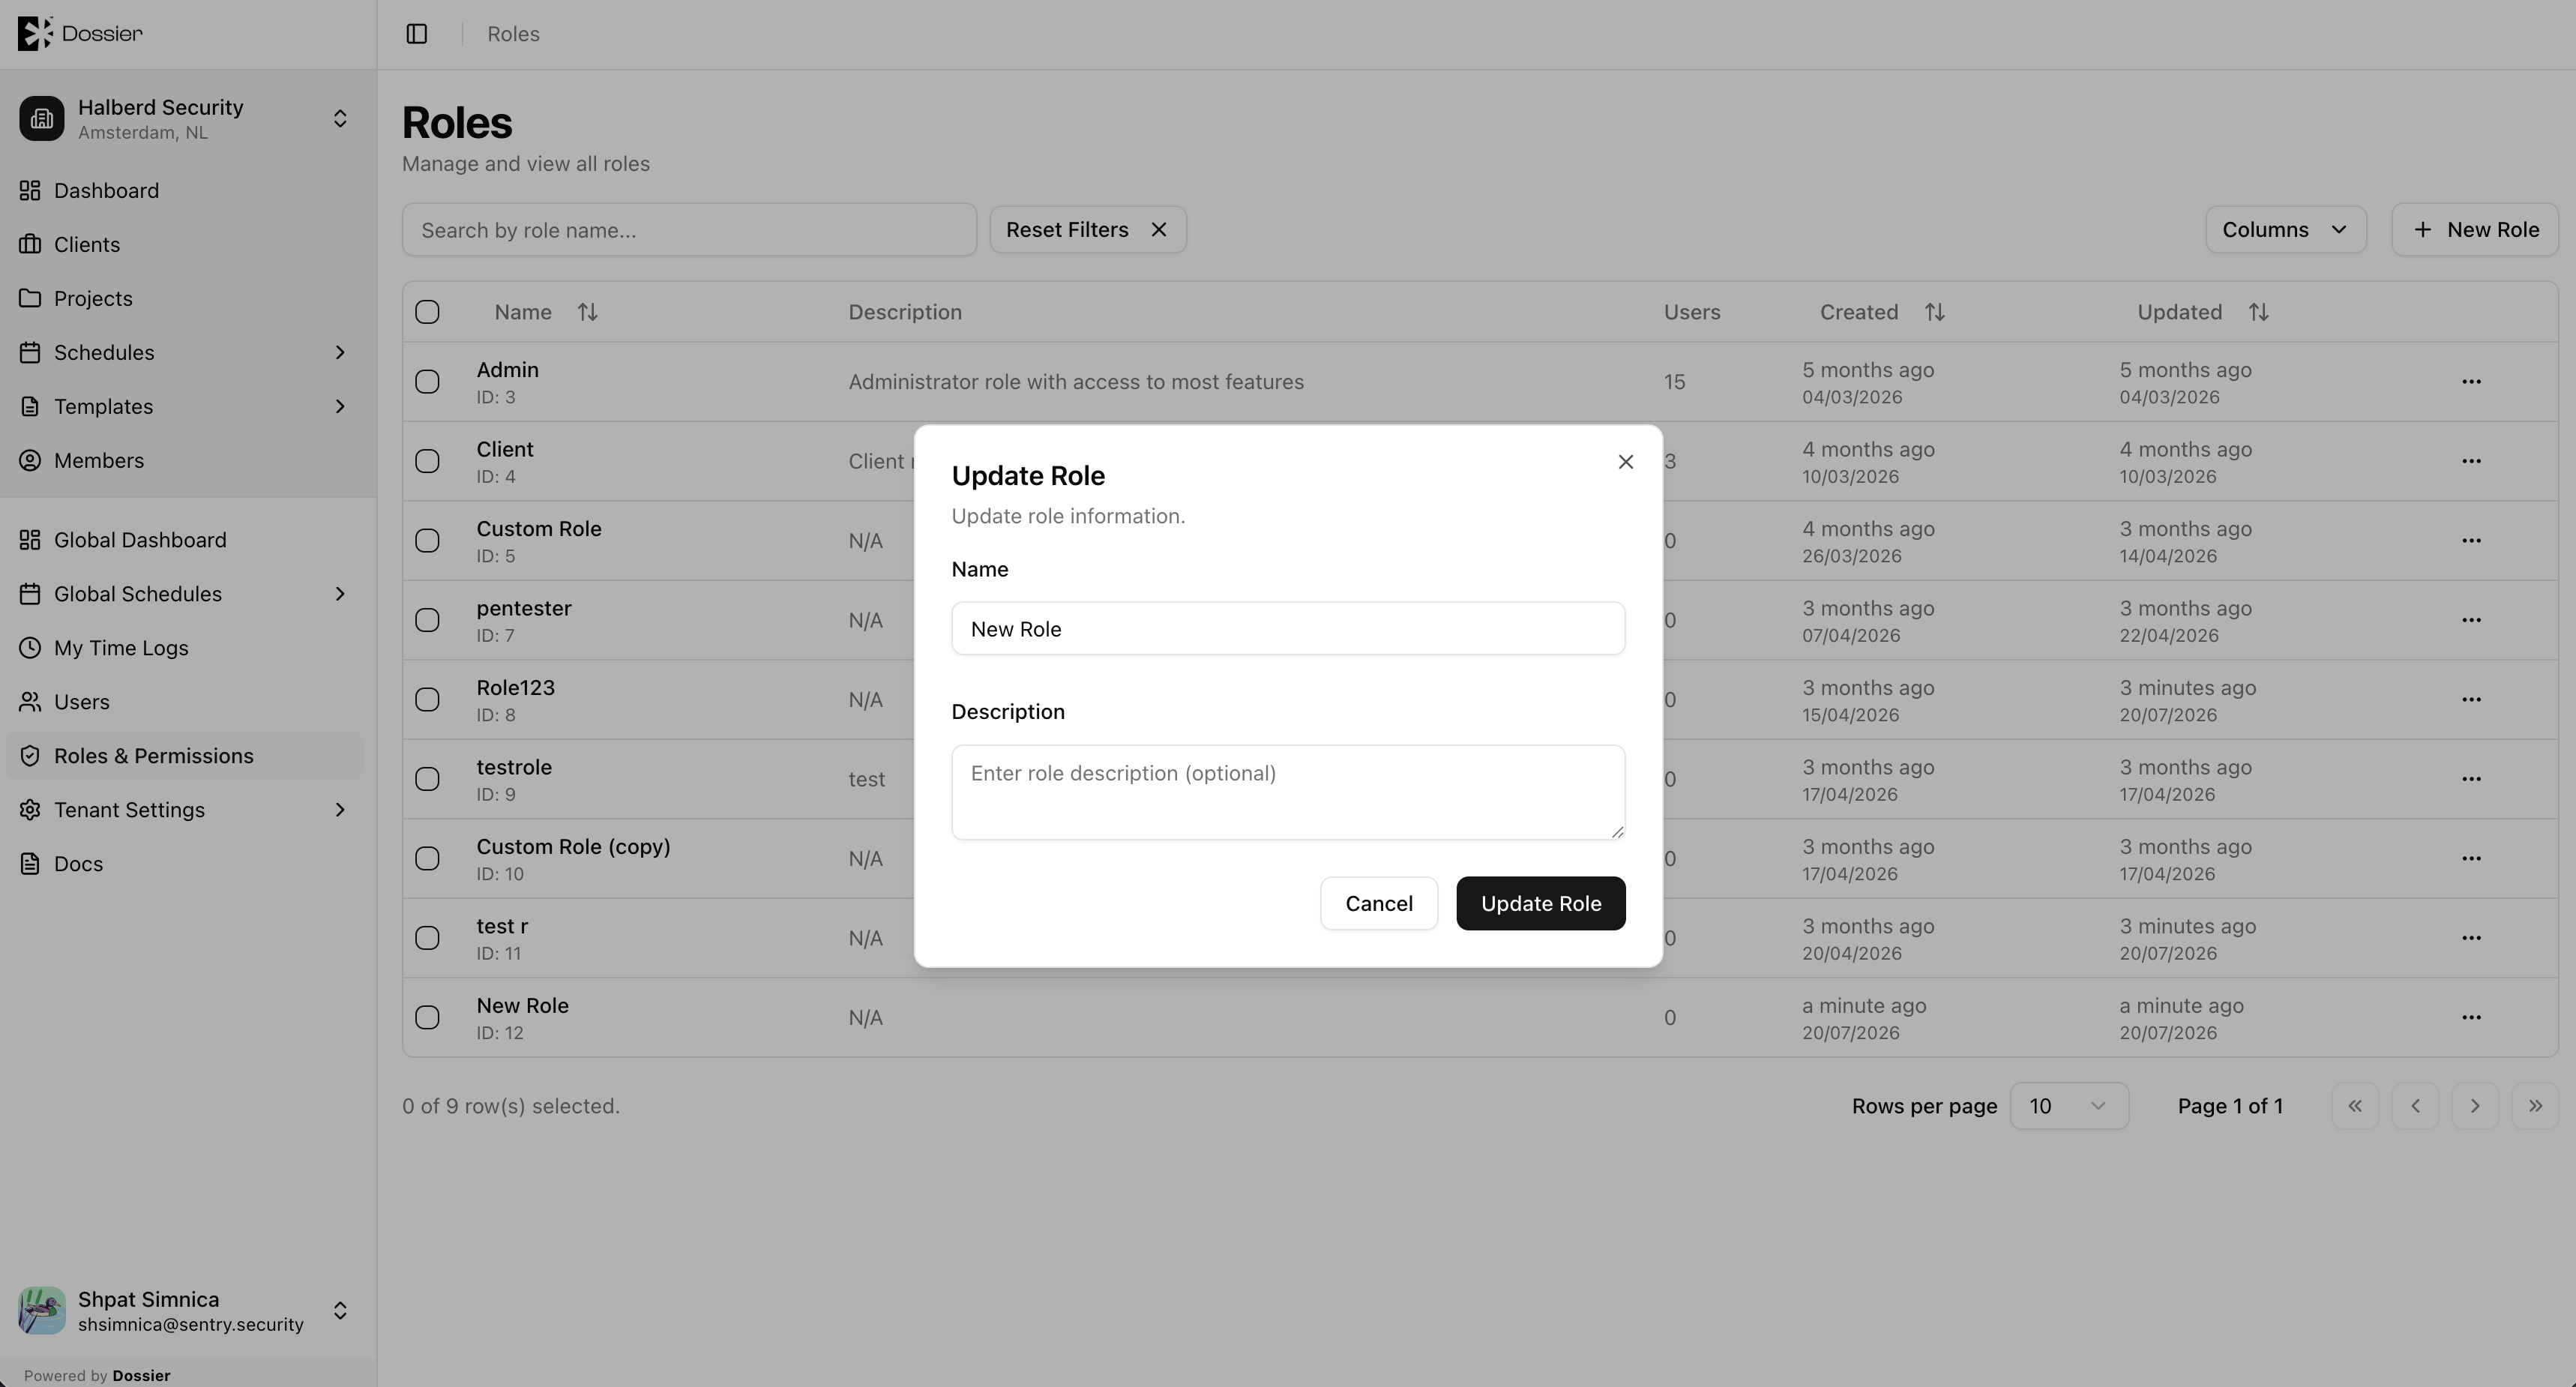
Step 3: Update role details (optional)
Switch to the Details tab to update the role name or description.
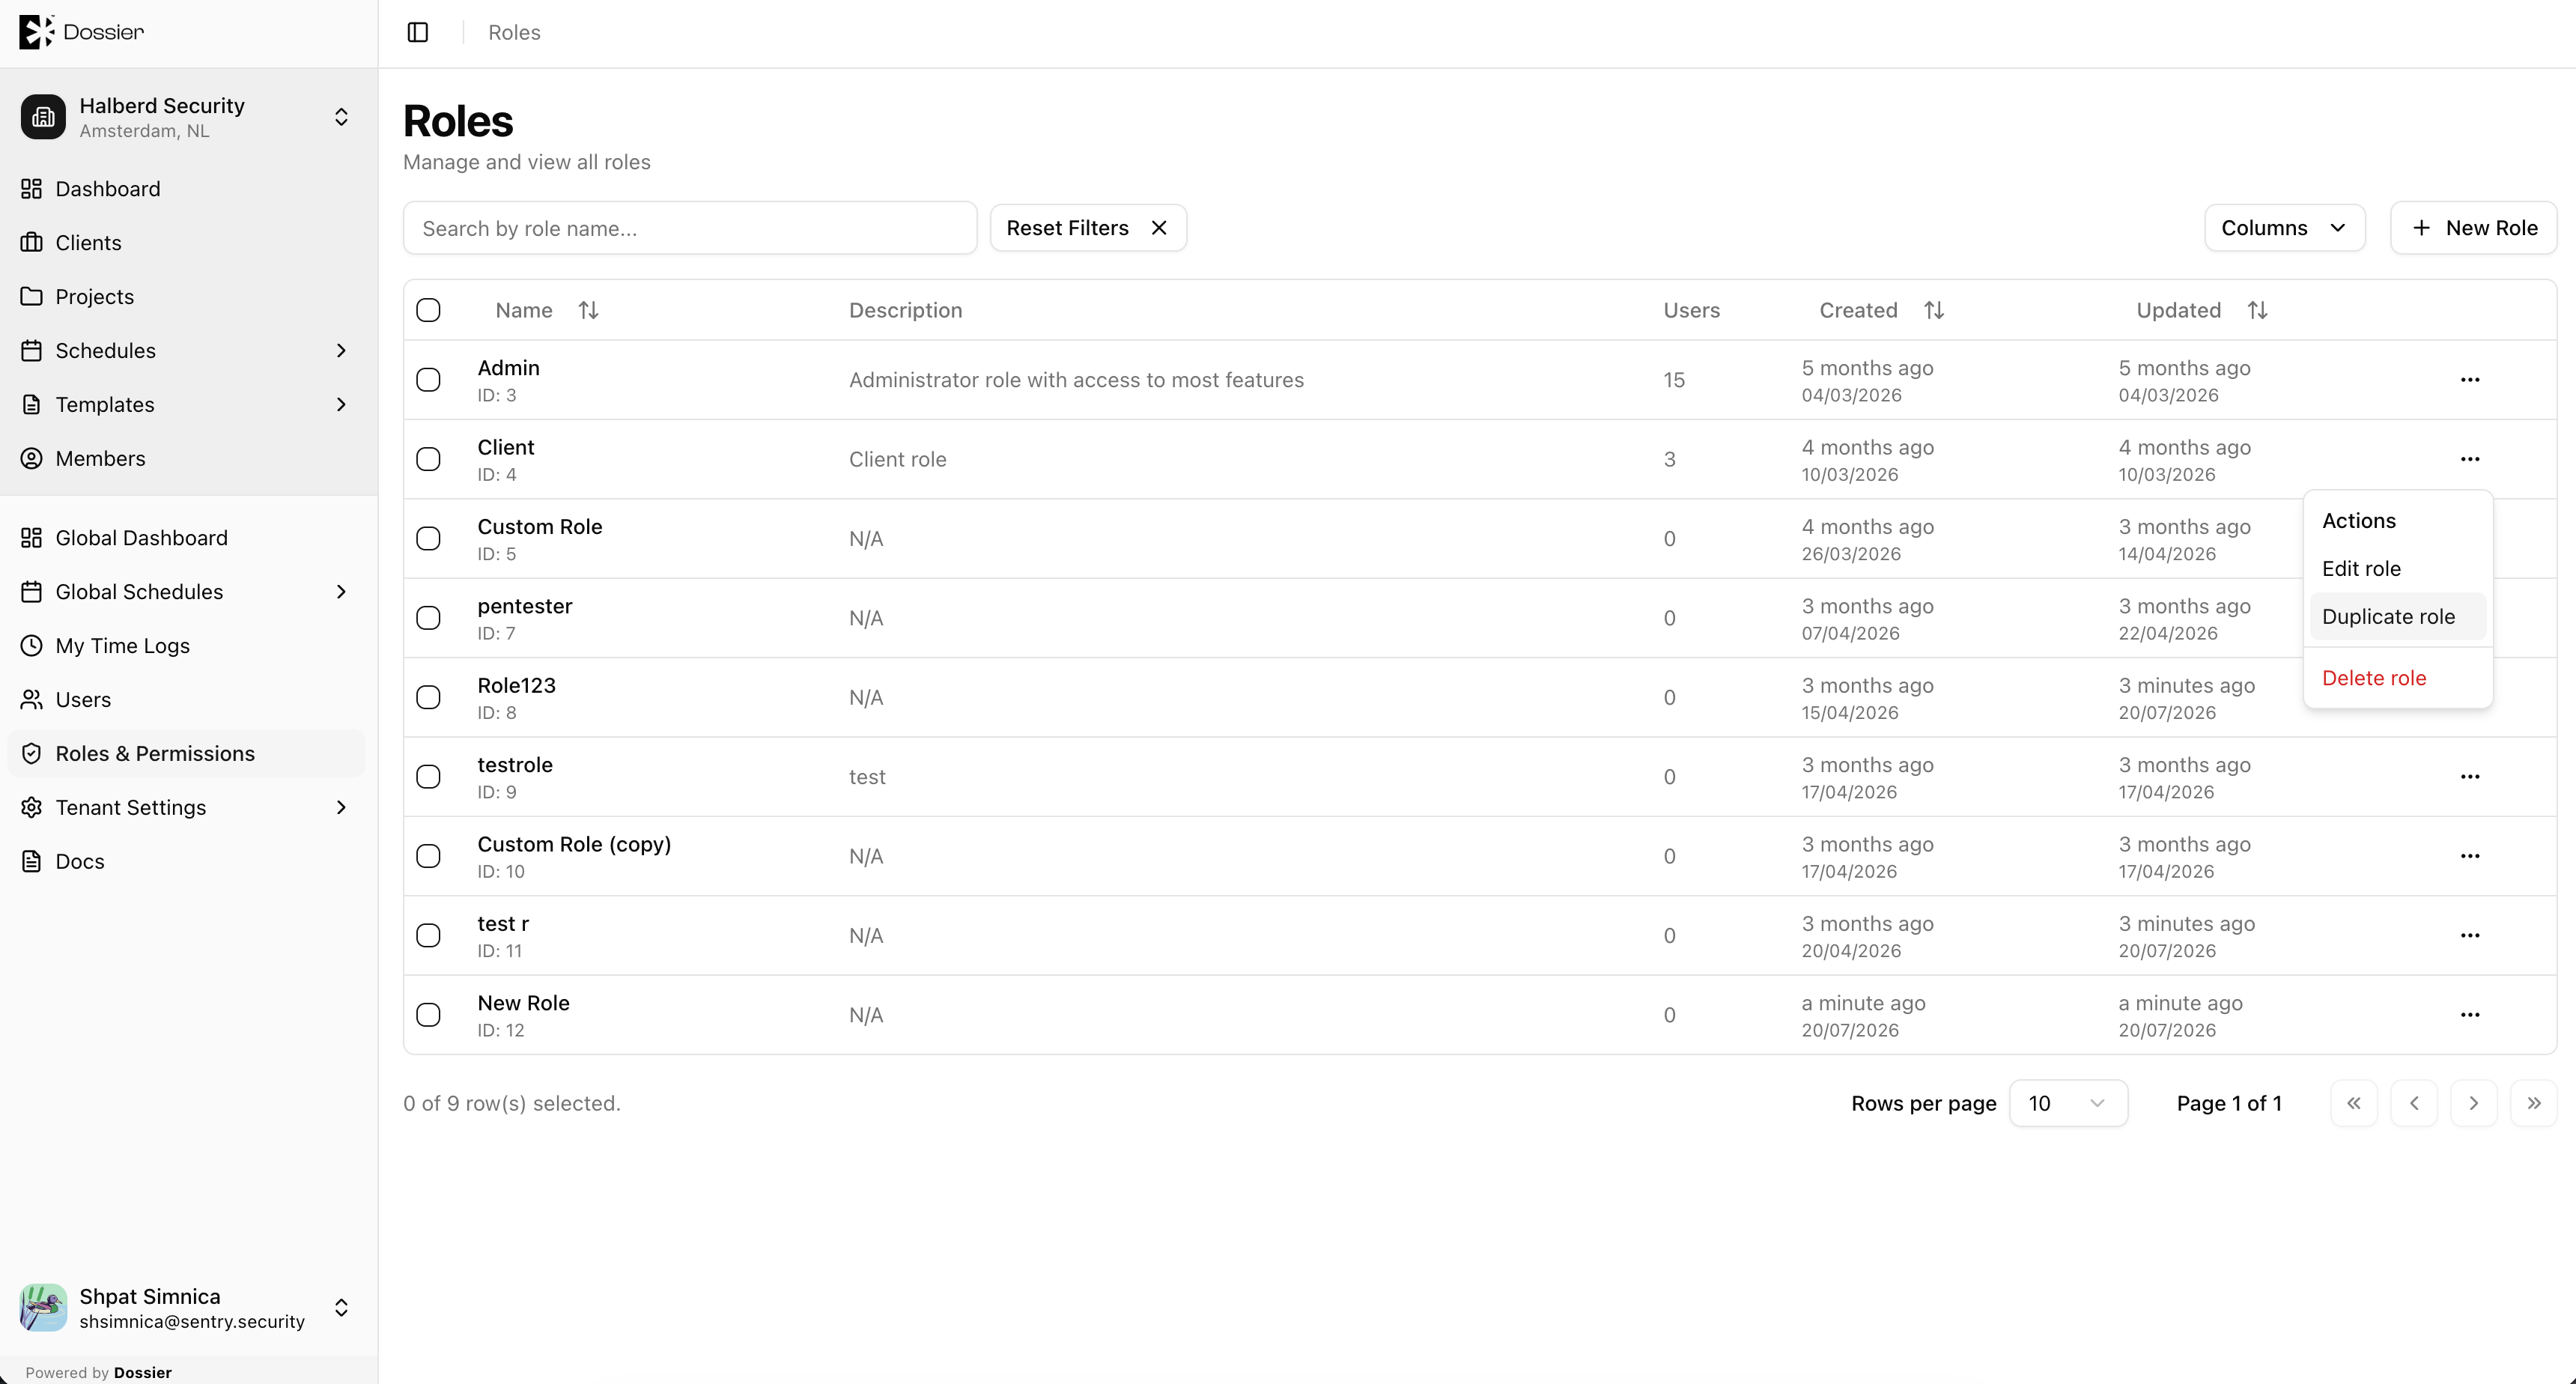
Duplicating a Role
Use the row action menu to duplicate an existing role. The copy includes all permissions and can be renamed.
Deleting a Role
Step 1: Open the role Details tab
Navigate to the role and click the Details tab.
Step 2: Click Delete
Confirm in the dialog.
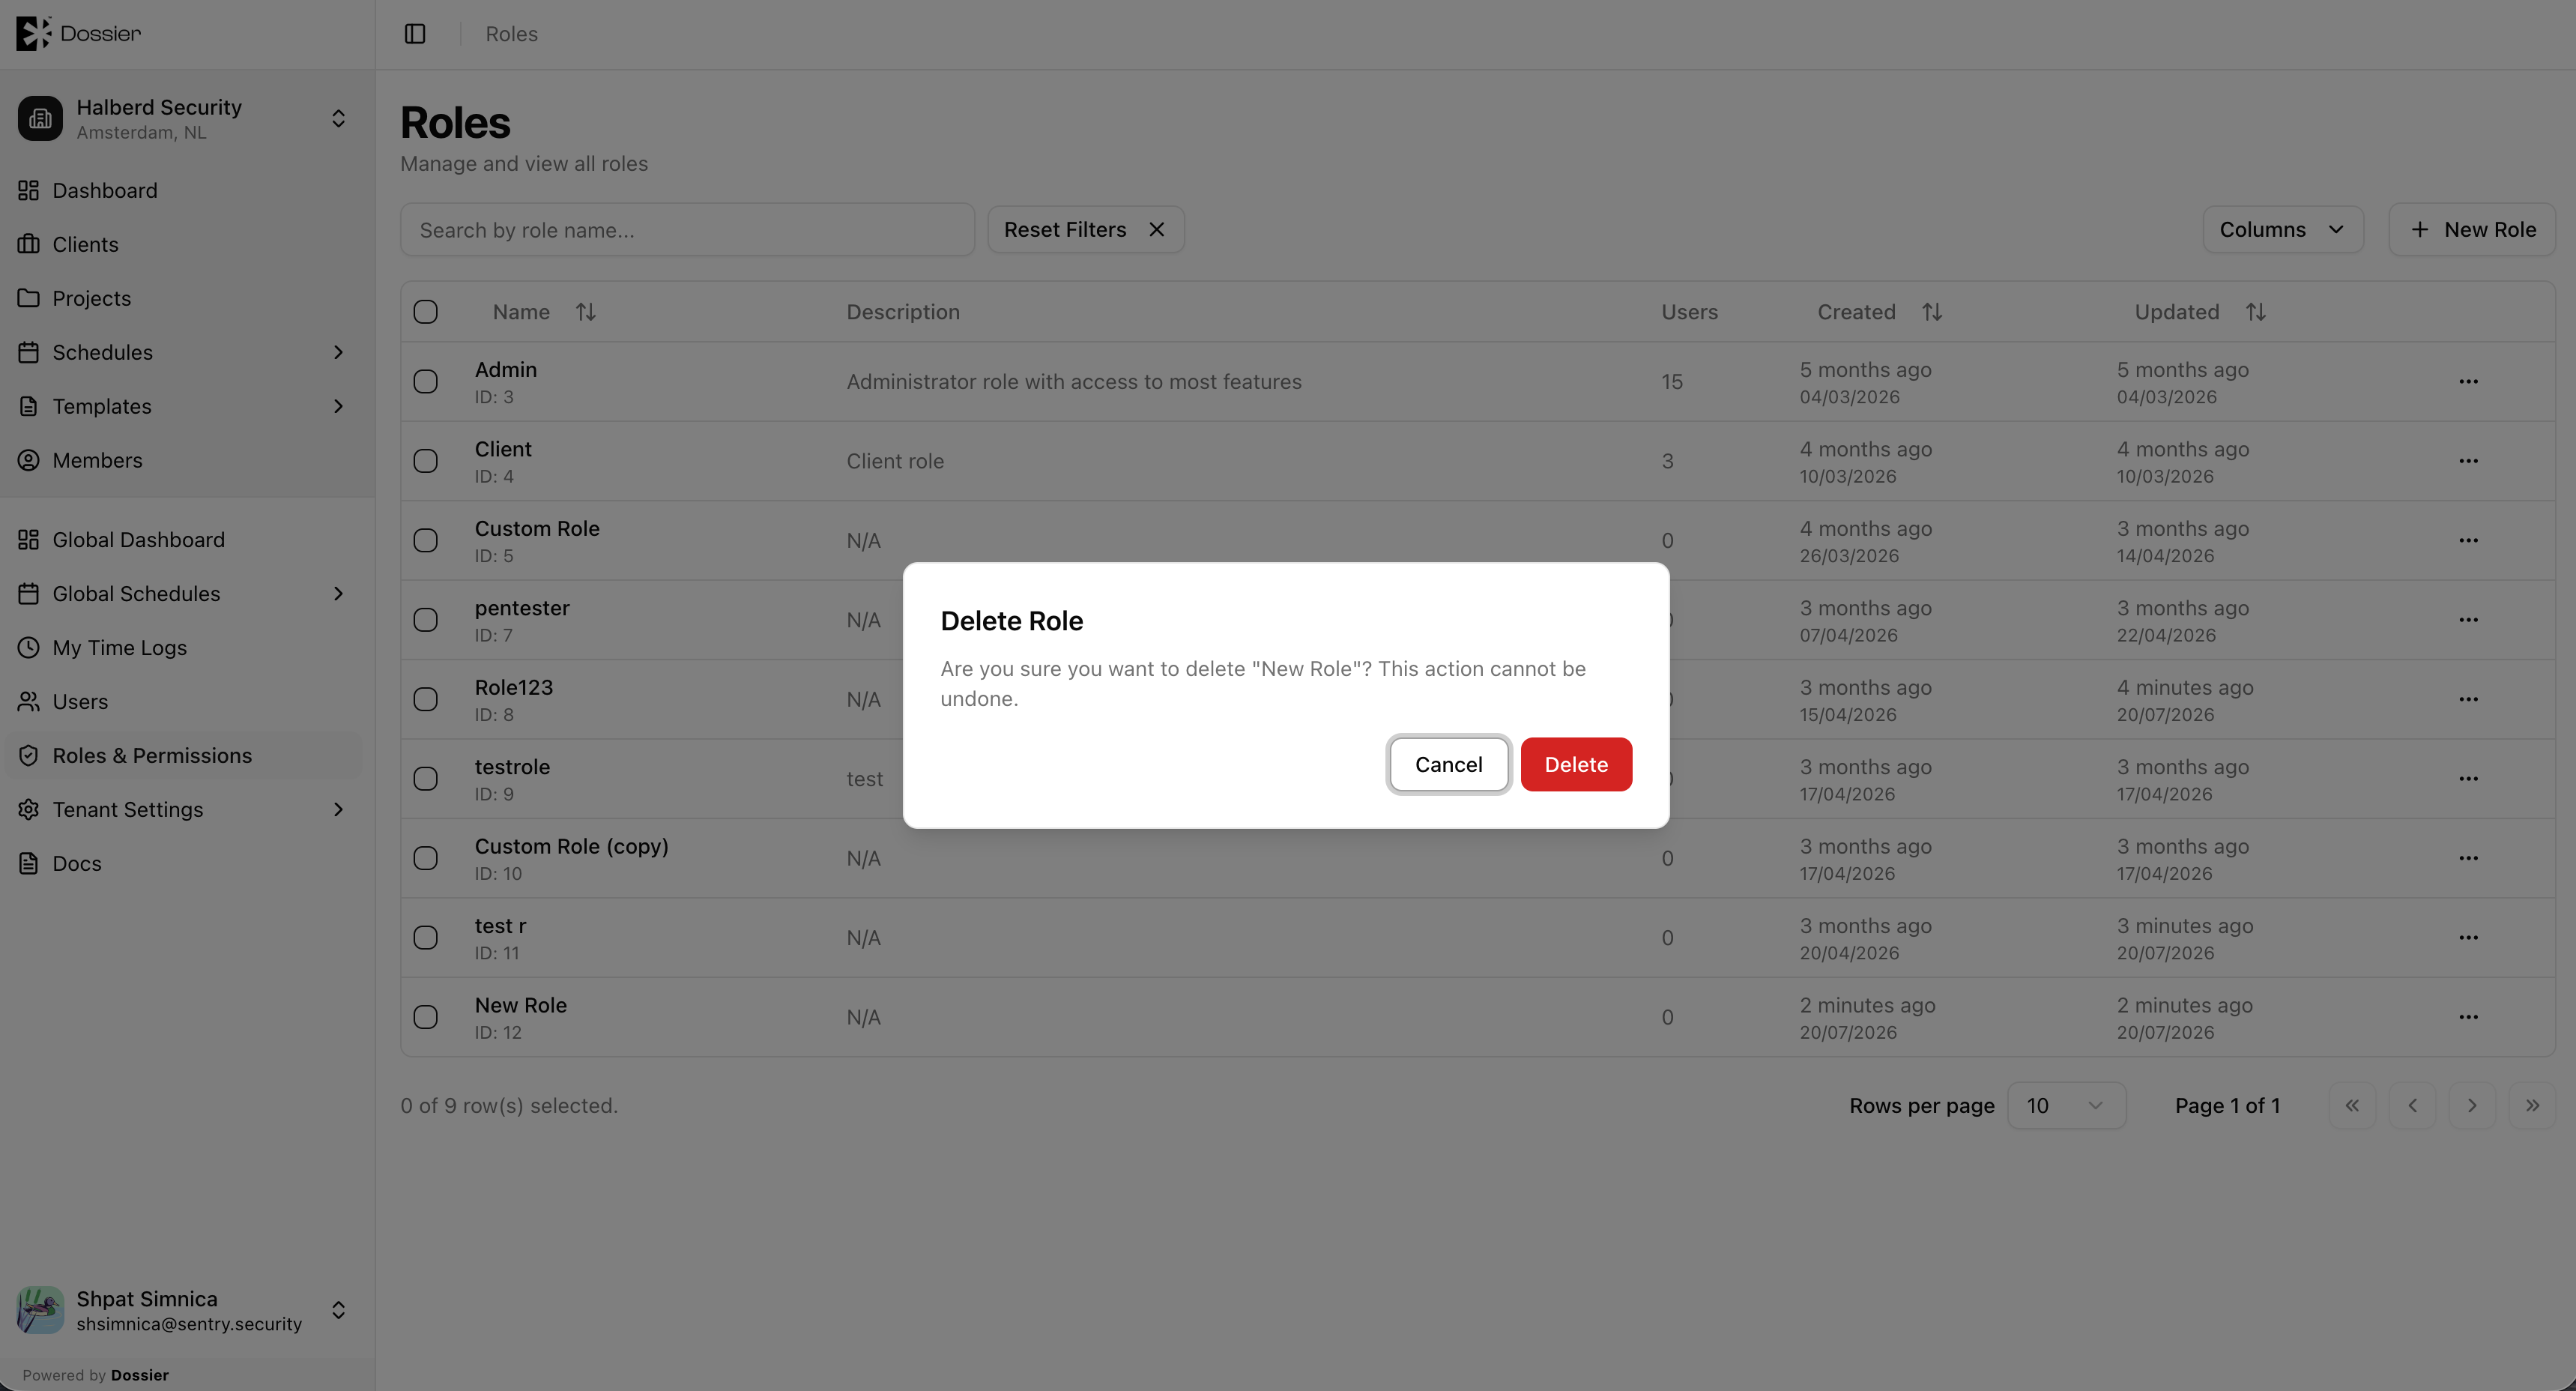
Users assigned to a deleted role will lose their permissions. Reassign them to another role before deleting.
Bulk Delete
Select multiple custom roles using checkboxes and click bulk delete. Built-in roles (Admin, Client) cannot be bulk deleted.